当你访问一个网站时,你可能点击一些东西,像链接或者按键。
链接可能跳转到当前网页的某一部分,也可能跳转到该网站的另一个网页或者是另一个网站。按键由JavaScript各种事件控制,触发某些函数。
在本教程中,我们将探索在JavaScript中使用两种不同的方式触发点击事件。
首先,我们将看传统的 onclick 风格,你可以在HTML里添加。然后我们将看到更现代的 “click” eventListner 是如何工作的,它可以让HTML和JavaScript分离。
如何使用onclick事件
当一个按键被点击时,对应的onclick事件会执行里面的函数。这可能发生在用户提交一个表单,也可能在你修改网页里的内容,以及其他类似的事情。
你把想执行的函数名放到按键标签里。
基础 onclick 语法
<element onclick="functionToExecute()">Click</element>
例如
<button onclick="functionToExecute()">Click</button>
请注意,onclick属性值是你想执行的函数名,它会调用该函数。
在JavaScript中,你会通过函数名调用函数,然后你在函数名后加上括号。
onclick 事件例子
我已经准备好了一些基本的HTML和样式,我们练习怎样把 onclick 事件加入进去。
<div>
  <p class="name">freeCodeCamp</p>
  <button>Change to Blue</button>
</div>
让它好看些的CSS,以及所有其他的示例代码:
 body {
   display: flex;
   align-items: center;
   justify-content: center;
   height: 100vh;
      }
p {
   font-size: 2rem;
}

button {
    padding: 7px;
    border: none;
    border-radius: 4px;
    cursor: pointer;
}

button.blue {
    background-color: #3498db;
}

button.green {
    background-color: #2ecc71;
}

button.orange {
   background-color: orangered;
}
这是我们看到的网页:
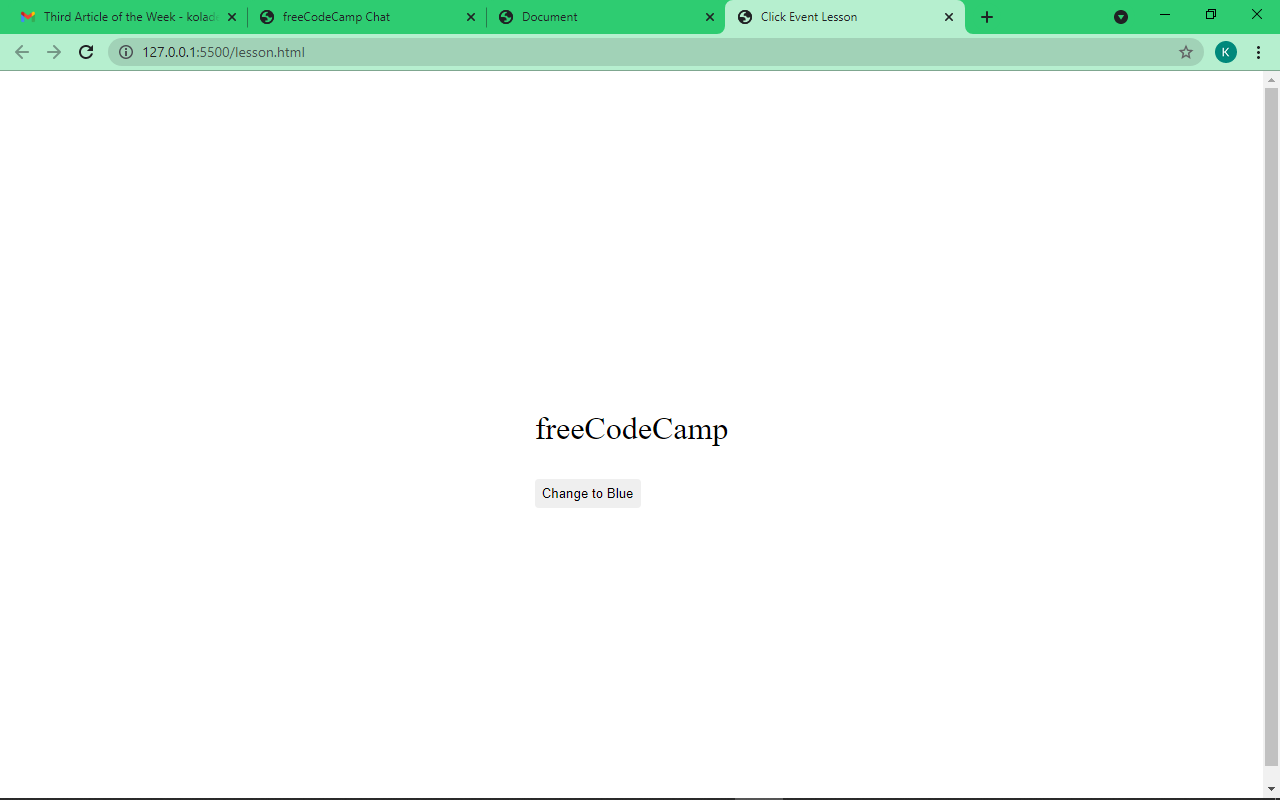
我们的目标是当我们点击这个按键时,文本的颜色变成蓝色。所以我们需要添加一个 onclick属性到按键上,然后白编写JavaScript函数来改变颜色。
我们需要在HTML做一些小小的改变。
<div>
  <p class="name">freeCodeCamp</p>
  <button onclick="changeColor()">Change to Blue</button>
</div>
我们要执行的函数是changeColor(),所以我们需要把它写到一个JavaScript文件里,或者写再HTML文件的<script>标签里。
如果你想把你的脚本写在一个JavaScript文件中,你需要在HTML里用下面的语法引用它。
<script src="path-to-javascript-file"></script>
如果你想在HTML里写脚本,把它放在script标签里。
<script>
  // Your Scripts
</script>
现在让我们来写changeColor()函数
首先,我们需要选择我们想操作的元素,也就是在<p>标签内的 freeCodeCamp 文本
在JavaScript中,你可以用DOM的 getElementById()、getElementsByClassName(),或者querySelector()方法把DOM对象存储在变量中。
在本教程中,我将使用querySelector() ,因为它更现代,而且运行更快。我还将使用 const来声明我们的变量,而不用let和var。因为使用const,事情将变得更安全,变量是只读的。
const name = document.querySelector(".name");
现在我们已经选定了文本,让我们来编写自己函数。在JavaScript中,函数的基本语法是这样的。
function funcctionName () {
    // What to do
}
这就是我们的函数:
function changeColor() {
    name.style.color = "blue";
}
发生了什么事情?
HTML中的changeColor()是我们要执行的函数,如果的这个名字与HTML中的函数名不一样,它就不会起作用。所以我们的函数名写成 changeColor。
在DOM(文档对象模型,指所有的HTML)中,要改变任何有关style的东西,你需要写上style,然后加上一个.。后面是你想要改变的东西,这可以是颜色(color),背景颜色(background),字体大小(fontsize)等。
因此,在我们的函数中,我们声明了变量来获取freeCodeCamp文本,然后我们把颜色改为蓝色。
点击按键时,文本的颜色会变成蓝色。
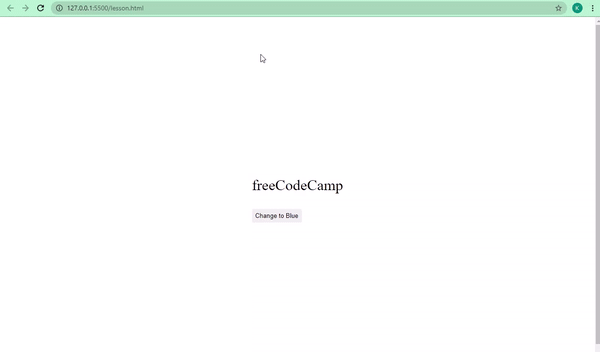
我们的代码运行成功了!
我们可以把事情做得更进一步,把我们的文字有更多的颜色变化。
<div>
      <p class="name">freeCodeCamp</p>
      <button onclick="changeColor('blue')" class="blue">Blue</button>
      <button onclick="changeColor('green')" class="green">Green</button>
      <button onclick="changeColor('orangered')" class="orange">Orange</button>
</div>
我们要把文本颜色改成蓝色,橙色和橙红色。
这一次,我们的 HTML 中的 onclick 函数获取了我们想要给文本设置的颜色的值。这些在 JavaScript 中被称为参数。我们要写的函数也需要自己的参数,我们将称之为 “颜色”。
我们的网页稍微变化一下:
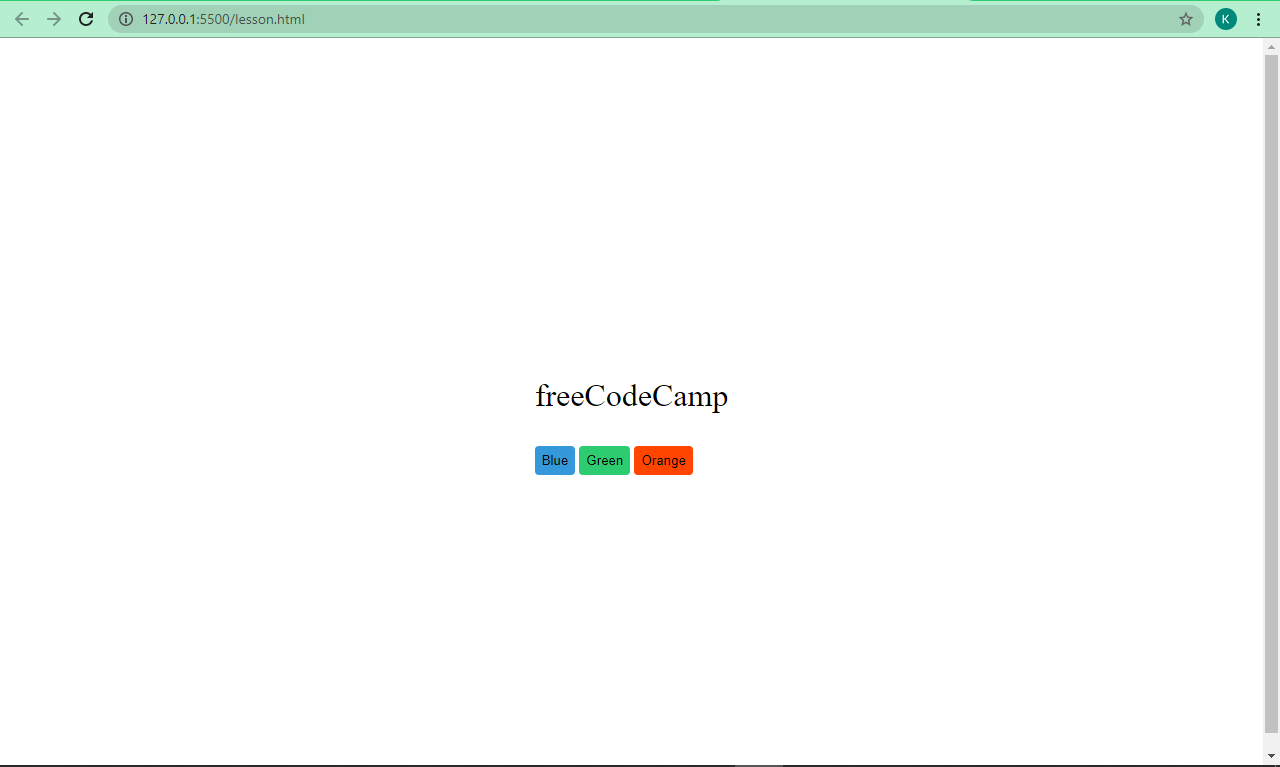
让freeCodeCamp文本通过我们写的函数可以变成蓝色,绿色,和橙红。
const name = document.querySelector(".name");

function changeColor(color) {
   name.style.color = color;
}
name变量获取了name的DOM对象(我们在这里存储了freeCodeCamp文本),然后颜色会根据我们传入changeColor()的颜色值变化。

如何在 JavaScript 中使用点击 eventListener
在JacaScript中,有多种方法做同一件事。随着JavaScirpt本身发展,我们开始需要将HTML,CSS和JavaScript代码分开,以达到最佳实践。
事件监听器使JavaScript和HTML分离成为可能。你也可以用onclick做到这一点,但是在这里采取另一种方法。
基本 eventListener 语法
element.addEventListener("type-of-event", functionToExecute)
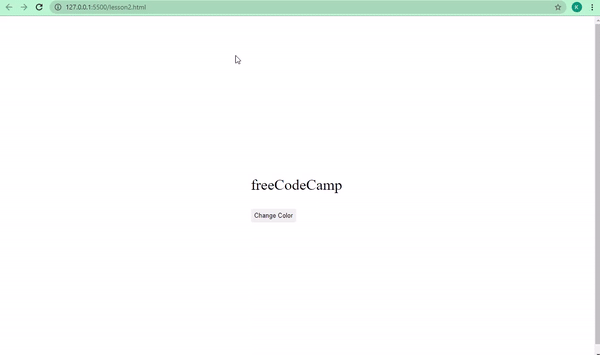
现在让我们使用ckick eventListner将freeCodeCamp文本变成蓝色。
这是我们新的HTML:
 <div>
      <p class="name">freeCodeCamp</p>
      <button>Change Color</button>
 </div>
这是网页效果。

这次在我们的脚本中,我们也需要选择按键(而不仅是freeCodeCamp文本)。因为在我们的按键的标签里没有任何JavaScript,这很酷。
这是我们的脚本的样子。
const name = document.querySelector(".name");
const btn = document.querySelector("button");

      btn.addEventListener("click", function () {
        name.style.color = "blue";
 });
我们也可以将我们的函数与eventListener 完全分开,我们的功能保持一样。
btn.addEventListener("click", changeColor);
      function changeColor() {
        name.style.color = "blue";
}
如何通过JavaScript建立一个 Show More 和 Show Less 按键。
学习的最好办法之一是去动手创建一个项目,用到我们已经学到的onclick 和 click eventLister,去做一些事情。
当你访问一个博客,你往往先看到文章的招录,然后你可以点击 read more按键,显示剩余内容。让我们尝试实现这个。
这是我们要处理的HTML:
 <article id="content">
      <p>
        freeCodeCamp is one of the best platforms to learn how to code.
        freeCodeCamp has a detailed curriculum that will take you from zero to
        hero in web development, software engineering, machine learning, and
        more.
      </p>

      <p>
        freeCodeCamp also has a YouTube channel containing over 1000 videos on
        web development, software engineering, machine learning, data science,
        freelance web development, database administration, and pretty much
        anything related to tech. To get updates when videos are uploaded, you
        need to subscribe to the channel and turn on notifications. You can also
        follow freeCodeCamp on Twitter, where links to well written articles and
        videos are tweeted daily.
      </p>

      <p>
        Since no one has to pay to learn how to code on freeCodeCamp,
        freeCodeCamp runs on voluntary donations from donors all around the
        world in order to pay employees and maintain servers. If you are
        generous enough consider joining the donors.
      </p>
    </article>

<button onclick="showMore()">Show more</button>
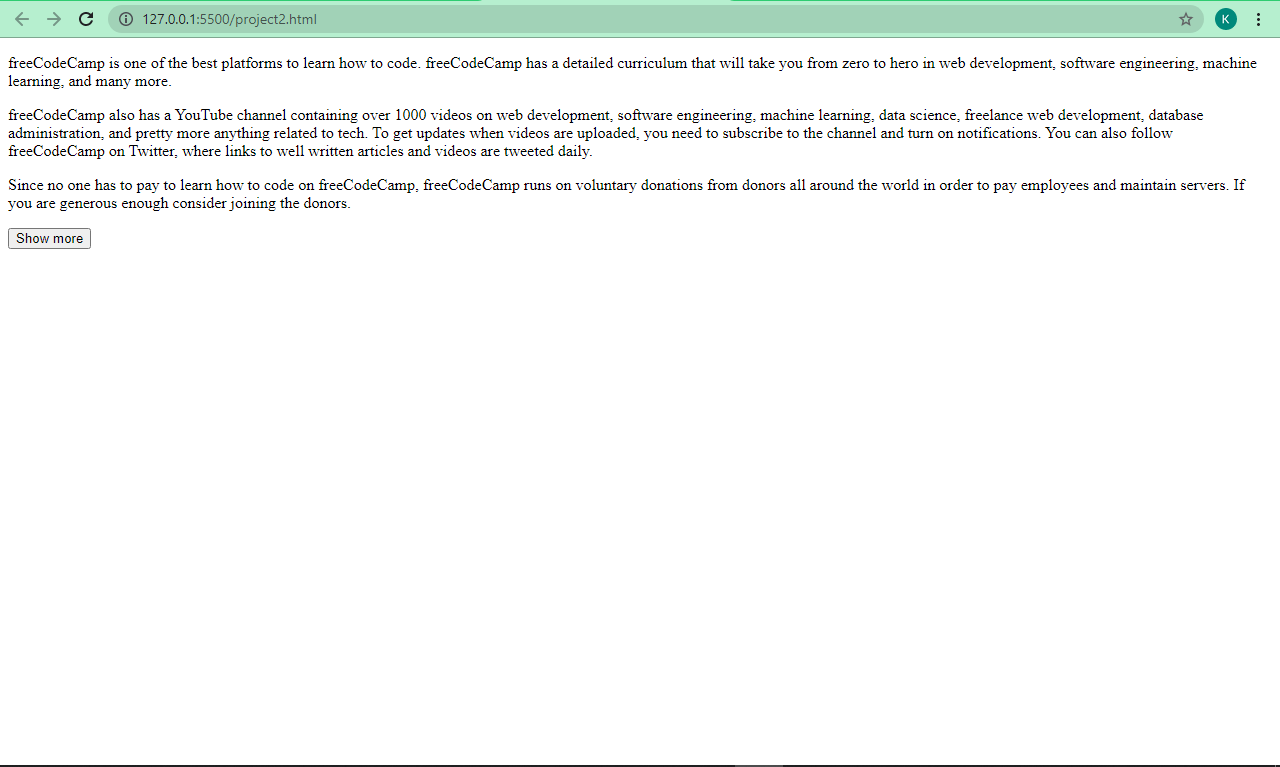
这是简单的HTML,是有关freeCodeCamp的事情。有个按键,我们已经给它加上了onClick。我们要执行的函数是showMore(),等下我们会写上。
没有CSS,是下面的效果:
它不是很难看,但是我们可以让它更美观,通过下面的CSS:
<style>
      * {
        margin: 0;
        padding: 0;
        box-sizing: border-box;
      }

      body {
        background: #f1f1f1;
        display: flex;
        align-items: center;
        justify-content: center;
        flex-direction: column;
      }

      article {
        width: 400px;
        background: #fff;
        padding: 20px 20px 0;
        font-size: 18px;
        max-height: 270px;
        overflow: hidden;
        transition: max-height 1s;
        text-align: justify;
        margin-top: 20px;
      }

      p {
        margin-bottom: 16px;
      }

      article.open {
        max-height: 1000px;
      }

      button {
        background: #0e0b22;
        color: #fff;
        padding: 0.6rem;
        margin-top: 20px;
        border: none;
        border-radius: 4px;
      }

      button:hover {
        cursor: pointer;
        background: #1e1d25;
      }
</style>
CSS做了什么?
通过选择器(*),我们删除了分配给元素的默认 margin和padding,这样我们可以添加自己的margin和padding。
我们还将box sizing 设置为border-box,这样我们就可以在元素的总宽度和总高度中包含padding和border。
我们用Flexbox将文字内容全部居中,并给它一个浅灰色的背景。
我们的<article>元素,是文本的容器,宽为400px,白色背景(#fff),顶部有20px的padding,左右各20px的padding,底部为0px的padding。
段落里的字体的标签大小为18px(font-size: 18px),然后我们给它们的最大高度为270px(max-height: 270px)。由于设置了最大高度,所有的文字不能包含进来,就会溢出,为了解决这个问题,我们将溢出设置为隐藏(overflow: hidden),这样一开始就不会显示这些文字。
过渡属性设置为每个变化在1秒后发生(transition: max-height 1s),所有的文本都是两端对齐(text-align: justify),并且有20px 的顶部边距(margin-top: 20px)。
因为我们去掉默认的margin,我们的段落将会挤到一起。避免这个,我们设置了p元素16px的底边距(margin-bottom: 16px),让段落彼此分开。
我们的选择器 article.open 有个属性max-height 设置为 1000px。这意味着任何一个aritcle元素有个class open,maximum height 将从270px 变为1000px,去显示文章的其余部分。这是用JavaScript实现的。
我们设置按键,使用深色背景(background: #0e0b22),白色按键(color: #fff),无边框(border: none),半径为4px(border-radius: 4px)。
最后,我们使用CSS中的伪类hover将按键的光标改为指针(pointer),当用户将光标悬停在按键上时,背景颜色会发生轻微的变化。
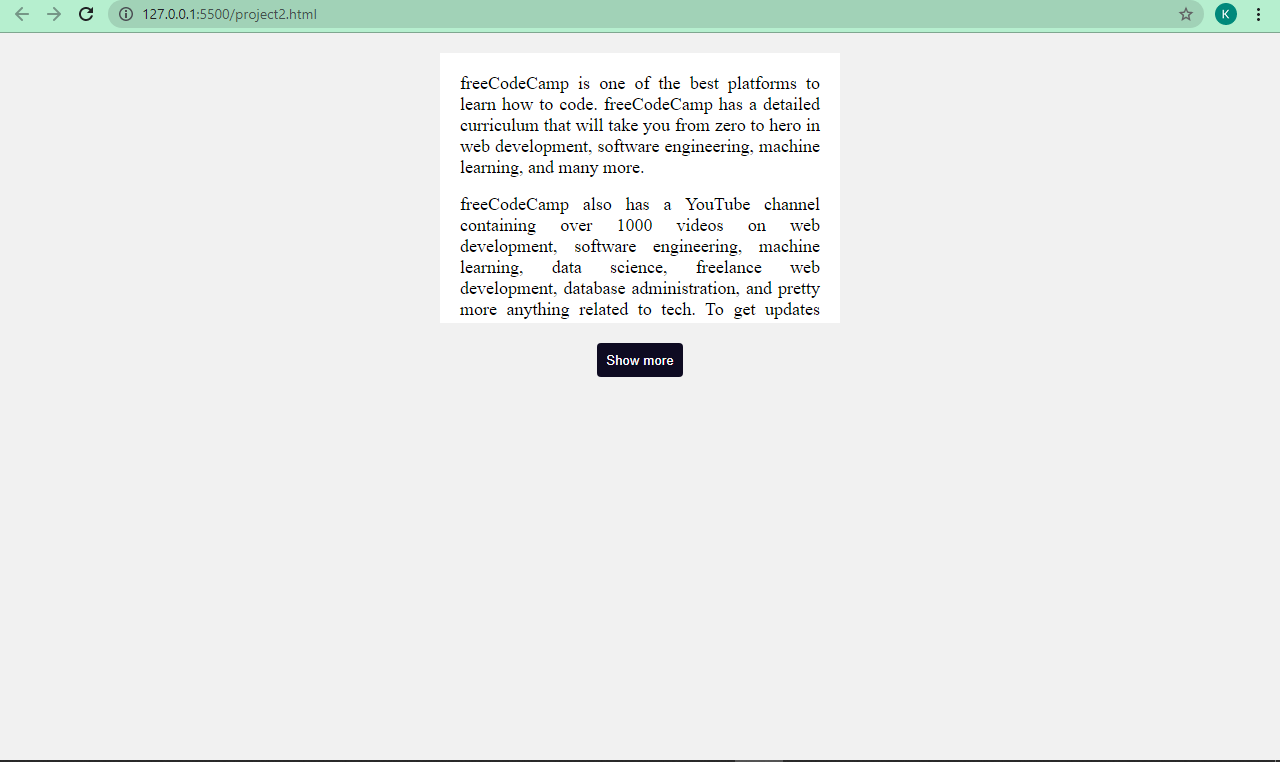
这就是CSS。
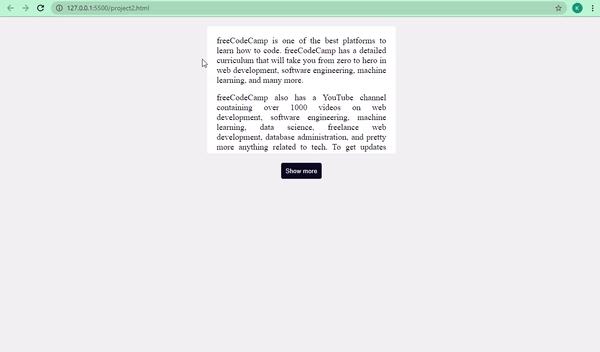
我们的页面更好看了:
下一件我们需要要做的事,编写我们的JavaScript,这样我们可以看到被隐藏的文章部分了。
我们有一个onclick属性在我们的按键内,去调用 showMore()函数,让我们写这个函数。
我们首先需要选择我们的article,因为我们要展示它的其余部分。
const article = document.querySelector("#content");
接下来,我们要写函数showMore(),这样我们能在Show More 和 Show Less 间进行切换。
function showMore() {
     if (article.className == "open") {
       // read less
       article.className = "";
       button.innerHTML = "Show more";
     } else {
       //read more
       article.className = "open";
       button.innerHTML = "Show less";
     }
  }
函数做了什么?
我们使用if...else语句,这是JavaScript的一个重要语句。它根据某个条件进行切换。
这是它的基本语法:
if (condition == "something") {
  // Do something
} else {
  // Do something else
}
如果article.className 为open时(也就是说,我们想给它加上open的类,在CSS中被设置为最大高度为1000px),然后我们可以看到文件的其余部分。如果不为open,文章回到初始状态,即它的一部分被隐藏。
我们在else语句中给它设置open的class,它显示文章其余部分。在if 语句中把 open的class去掉,这使它恢复初始状态。
我们的代码能在Show More 和 Show Less 间进行切换:

我们可以把HTML和JavaScript分离的前提下,接着使用onclick ,因为onclick是JavaScript。所以把它写到一个JavaScript文件里,而不是写在HTML。
 button.onclick = function () {
     if (article.className == "open") {
       // read less
       article.className = "";
       button.innerHTML = "Show more";
     } else {
       //read more
       article.className = "open";
       button.innerHTML = "Show less";
     }
  };
我们也可以用eventListner实现:
<article id="content">
      <p>
        freeCodeCamp is one of the best platforms to learn how to code.
        freeCodeCamp has a detailed curriculum that will take you from zero to
        hero in web development, software engineering, machine learning, and
        many more.
      </p>

      <p>
        freeCodeCamp also has a YouTube channel containing over 1000 videos on
        web development, software engineering, machine learning, data science,
        freelance web development, database administration, and pretty more
        anything related to tech. To get updates when videos are uploaded, you
        need to subscribe to the channel and turn on notifications. You can also
        follow freeCodeCamp on Twitter, where links to well written articles and
        videos are tweeted daily.
      </p>

      <p>
        Since no one has to pay to learn how to code on freeCodeCamp,
        freeCodeCamp runs on voluntary donations from donors all around the
        world in order to pay employees and maintain servers. If you are
        generous enough consider joining the donors.
      </p>
</article>

<button id="read-more">Show more</button>
 const article = document.querySelector("#content");
 const button = document.querySelector("#read-more");

button.addEventListener("click", readMore);

function readMore() {
     if (article.className == "open") {
       // Read less
     article.className = "";
     button.innerHTML = "Show more";
   } else {
     article.className = "open";
     button.innerHTML = "Show less";
   }
}
我们的功能是一样的!
总结
我希望本教程帮助你了解点击事件在JavaScript中是怎么工作的。我们探讨了两种不同的方法,所以你可以在编码中使用它们。
感谢阅读本文。
原文:HTML Button onclick – JavaScript Click Event Tutorial,作者:Kolade Chris