

大多数在表格中显示数据列表的站点通常都应用了某种过滤功能。这有助于用户根据他们在表单输入中键入的文本过滤相关项目。
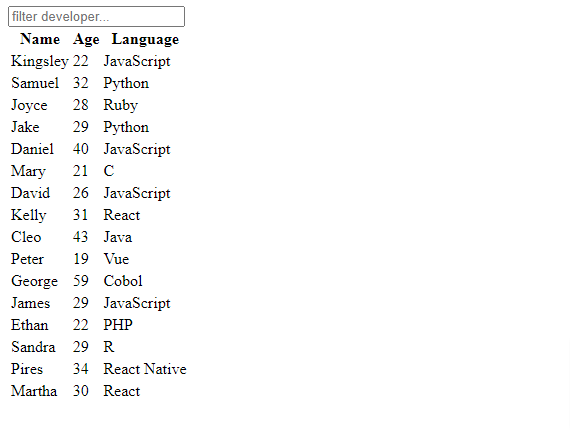
在这篇快速教程中,我们将构建一个响应式可过滤的表格,如下所示:

该表格将包含开发人员列表。每行包含一个名字、一个年龄和编程语言。当用户在输入字段中输入时,表格将过滤并返回与输入值匹配的行。
在构建它的过程中,你将了解一些 CSS 属性以及 JavaScript DOM 访问/操作。
你可以从 CodePen 获取示例代码。
开始
你需要在项目文件夹中创建三个简单的文件。它们是用于 HTML 标记的 index.html、用于样式的 styles.css 和用于脚本的 index.js。
<!DOCTYPE html>
<html lang="en">
<head>
  <meta charset="UTF-8">
  <meta name="viewport" content="width=device-width, initial-scale=1.0">
  <meta http-equiv="X-UA-Compatible" content="ie=edge">
  <title>Filterable Table</title>
  <link rel="stylesheet" href="styles.css">
</head>
<body>

  <script src="index.js" type="text/javascript"></script>
</body>
</html>
确保像我在上面的 HTML 中所做的那样链接你的样式表和脚本文件。
HTML
在 body 标签中添加以下标记:
<div class="app">
    <input type="text" id="searchInput" placeholder="filter developer...">

    <table>
      <thead>
        <tr>
          <th>Name</th>
          <th>Age</th>
          <th>Language</th>
        </tr>
      </thead>
      <tbody id="names">
        <tr>
          <td>Kingsley</td>
          <td>32</td>
          <td>JavaScript</td>
        </tr>
        <tr>
          <td>Samuel</td>
          <td>22</td>
          <td>Python</td>
        </tr>
        <tr>
          <td>Joyce</td>
          <td>28</td>
          <td>Ruby</td>
        </tr>
        <tr>
          <td>Jake</td>
          <td>29</td>
          <td>Python</td>
        </tr>
        <tr>
          <td>Daniel</td>
          <td>40</td>
          <td>JavaScript</td>
        </tr>
        <tr>
          <td>Mary</td>
          <td>21</td>
          <td>C</td>
        </tr>
        <tr>
          <td>David</td>
          <td>26</td>
          <td>JavaScript</td>
        </tr>
        <tr>
          <td>Kelly</td>
          <td>31</td>
          <td>React</td>
        </tr>
        <tr>
          <td>Cleo</td>
          <td>43</td>
          <td>Java</td>
        </tr>
        <tr>
          <td>Peter</td>
          <td>19</td>
          <td>Vue</td>
        </tr>
        <tr>
          <td>George</td>
          <td>59</td>
          <td>Cobol</td>
        </tr>
        <tr>
          <td>James</td>
          <td>29</td>
          <td>JavaScript</td>
        </tr>
        <tr>
          <td>Ethan</td>
          <td>22</td>
          <td>PHP</td>
        </tr>
        <tr>
          <td>Sandra</td>
          <td>29</td>
          <td>R</td>
        </tr>
        <tr>
          <td>Pires</td>
          <td>34</td>
          <td>React Native</td>
        </tr>
        <tr>
          <td>Martha</td>
          <td>30</td>
          <td>React</td>
        </tr>
      </tbody>
    </table>
  </div>
第一个元素是表单输入。我们将使用它来收集用户的数据。
然后是表格。该表由表头(thead)和主体(tbody)组成。表头有一行(tr)数据,即标题。正文有 16 行数据,每行数据由姓名、年龄和编程语言组成。
我们将这两个元素都放在一个父级 div 标签中。它们将帮助我们对齐,我们稍后将在 CSS 中看到。
保存文件,并在网络浏览器上打开应用程序。
如何使用 CSS 设置表格样式
我们现在将对表格应用一些样式。首先,我们像这样设置基本样式:
@import url("https://fonts.googleapis.com/css2?family=Lato:wght@300&display=swap");

/* Set no margin and padding around body. Set height to take up entire screen height. Align everything to the center, both horizontally and vertically */

body {
  margin: 0;
  height: 100vh;
  padding: 0;
  font-family: "lato", sans-seriff;
  display: grid;
  justify-content: center;
  align-items: center;
  font-size: 20px;
}

/* Remove border and outline around input. Set width to take up the entire width of parent and set margin on bottom */

#searchInput {
  border: none;
  outline: none;
  width: 100%;
  margin-bottom: 20px;
}

/* When input gains focus, add a blue border below it */

#searchInput:focus {
  border-bottom: 2px solid #4575b6;
}
表格将居中对齐。

为了使表格看起来更好,我们可以使用以下样式规则:
/* Sets width of table container (div) to 80% of browser window's width and the height to 100% of window's height. `vh` and `vw` makes the table responsive because it scales along with screen size. Also set margin of 20px to top and bottom */

.app {
  width: 80vw;
  height: 100vh;
  margin: 20px 0;
}

/* Collapse all borders separating each cell. Table takes up entire width of .app. Set gray shadow around table */
table {
  border-collapse: collapse;
  width: 100%;
  box-shadow: 0 5px 7px gray;
}

/* Set shadow on just the table head */
thead {
  box-shadow: 0px 0px 10px gray;
}

/* Add some space around table heading. Align text to right and transform to uppercase */

th {
  padding: 1rem 3rem;
  text-transform: uppercase;
  letter-spacing: 1px;
  text-align: left;
}

/* Add padding on each cell */
td {
  padding: 0.5rem 3rem;
  font-size: 1rem;
}

/* Create alternating color(blue) across the rows. Set blue on all even ones (2, 4, 6 ...) */

tr:nth-child(even) {
  background-color: #dee8f5;
}
现在我们的表看起来更好了,而且它也是响应式了。
如何使用 JavaScript 实现过滤器功能
此时表格几乎是静态的。使用 JavaScript,我们将实现基于用户在表单字段中键入的内容来过滤名称的逻辑。
在你的脚本文件中,定义一个名为 filter 的函数。在前三行中,我们访问用户的输入值,将表格主体 <tbody> 传递给变量 names,最后从 <tbody> 内部访问所有表行 <tr>。
我们还将值更改为大写,以确保所有内容都一致(用户可能键入 “j” 而不是 “J”)。
  /* This function will check for the user's input and based on that will either hide or display a particular row */

  function filter() {
    // Access text value and elements from the DOM
    let value = document.getElementById("searchInput").value.toUpperCase();
    let names = document.getElementById("names");
    let rows = names.getElementsByTagName("tr");

   // Code continues
接下来,我们遍历每个数组。对于每一行,我们访问最后一列(语言列)并获取其文本内容(实际值)。
for (i = 0; i < rows.length; i++) {
    let column = rows[i].getElementsByTagName("td")[2];
    let language = column.textContent;

    rows[i].style.display =
      language.toUpperCase().indexOf(value) > -1 ? "" : "none";
  }
}

document.getElementById("searchInput").addEventListener("keyup", filter);
如果表中的实际字符串值包含用户输入中的任何值,我们将显示该行。否则,我们将其隐藏。我们还使用了三元运算符来缩短条件语句。
最后,我们在输入上添加一个事件监听器。每次释放键时,都会调用过滤器。
这是完整的代码:
function filter() {
  let value = document.getElementById("searchInput").value.toUpperCase();
  var names = document.getElementById("names");
  var rows = names.getElementsByTagName("tr");

  for (i = 0; i < rows.length; i++) {
    let column = rows[i].getElementsByTagName("td")[2];
    let language = column.textContent;

    rows[i].style.display =
      language.toUpperCase().indexOf(value) > -1 ? "" : "none";
  }
}

document.getElementById("searchInput").addEventListener("keyup", filter);
你的表格最终应该与此类似:
总结
仅使用 HTML、CSS 和 JavaScript,你就可以创建一些具有高级功能的非常时尚的元素。
我希望你能从这篇文章中学到一些东西。再一次提醒,你可以查看 CodePen 上的代码并根据需要对其进行调整。
感谢你阅读本文。
原文:How to Build a Responsive Form with Filter Functionality Using HTML, CSS, and JavaScript,作者:Kingsley Ubah